Installing a Water Butt provides homeowners a number of valuable benefits - from saving and storing water, to cutting down on water waste, and saving money on utility bills - benefits which are increasingly amplified as water resources in the UK are under constant pressure from climate change and population growth.
Water Butts, simply put, are a large outside storage unit designed to effectively catch and store a substantial amount of rainwater, making them a great investment after the recent rainfall we have experienced over the past few months.
Enthusiastic gardeners can benefit from using Water Butts as they provide a convenient and continuous supply of water. Water Butts are also invaluable during a hose pipe ban, offering an extra bank of water.
Whether you are an installer, a seasoned DIY expert or simply someone who cares about the environment, our comprehensive guide on How to install a water butt: step by step will help you provide a faultless installation for your next project.
How does a Water Butt work?
An installed Water Butt, whether it's situated outside of the property, garage or even a greenhouse, will collect the rainwater that gathers in the guttering.
Rainwater that falls onto the guttering will run towards the downpipe. It will then travel into the downpipe, but instead of going down the grid, a diverter will be in place which will take the water out of the downpipe and divert it using a hose into the water butt.
The rainwater gathered will be stored inside the Water Butt for future use.
It is important to keep in mind that while there are different sizes of Water Butts available and various different diverters to choose from, ultimately, the principle is the same.

Will a Water Butt help save money?
We tend to think of water as a given rather than a privilege. It runs through our taps, and we rarely give it a second thought. Water is, however, a luxury…
According to the Water Services Regulation Authority, it costs roughly £1.50 per hour to water a garden using your mains water supply. With everyday use, those pounds can quickly add up over the summer.
It is estimated that a standard Water Butt can save on average around 30,000 million litres of water over the summer months, so throughout the UK, more and more homeowners are opting for this wildly popular alternative.
What Tools are needed for installing a Water Butt?
The specific tools needed for installing a water butt could vary, depending on the type of water butt you are installing and the location you are installing it in.
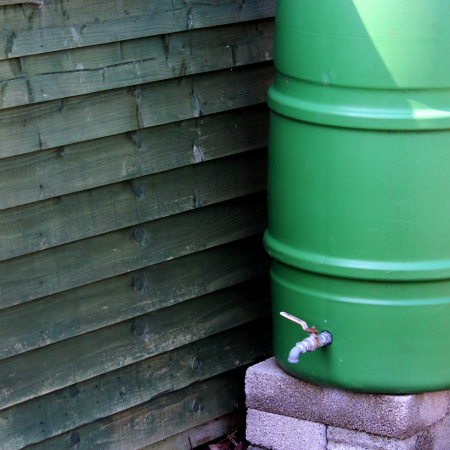
It's advised to elevate the water butt off the ground by using a stand for the water butt to sit on. This is so you can get access to the tap at the bottom of the tank, allowing enough room to fit a watering can underneath.
If your client requires a stand, you will need a wrench to tighten the bolts. It is also essential to wear gloves and eye protection during installation, as there is a risk of injury from sharp objects.
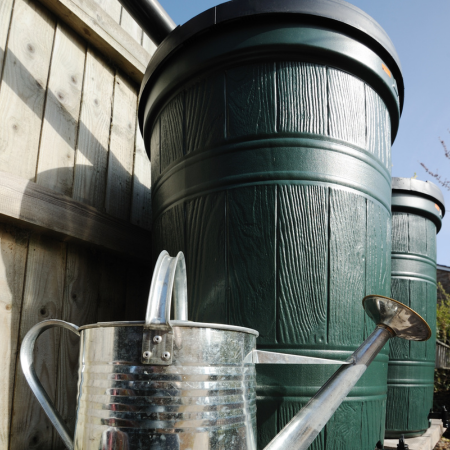
Homeowners also have the option to install two water butts if they desire to harvest more rainwater. All you need is a connector kit to fit one tank to the other.
Here are some fundamental tools you need for installing a water butt:
We stock a vast range of tools that can prove beneficial for your next installation project.
Installing a Water Butt: Step-by-step
Installing a water butt is a relatively straightforward procedure:
- Depending on the type of diverter you are using, the recommended clearance you will need away from the downpipe is approximately 500mm.
- If you require more clearance over the recommended distance, then you can use additional rigid overflow pipes.
- First, measure and mark approximately 100mm from the top of the water butt for the feeder pipe. Now you can proceed to drill the hole.
- Next, measure and mark across from the hole to the downpipe.
- Be aware that some models may require you to remove a section of the downpipe. Be sure to check the instructions for the particular brand of water butt.
- Next, you will need to saw through the downpipe. Loosening the screw fasteners further up the downpipe will make it easier to fit the diverter.
Once cut, fit the flexible splash seal to the top section of the pipe.


- Now, fit the diverter socket between the two sections of the downpipe. Make sure that the socket is positioned so that the pipe outlet is at the bottom.
- Adjust the splash seal over the top of the diverter. If loosened, be sure to re-tighten the screws further up the downpipe.
- With the diverter now in place, you can now attach the pipe.
- To fit the pipe, simply remove the nut and push the connector through the hole out from inside of the water butt and then re-tighten. You can also use gutter sealant for an ever-better connection.
- Finally, with the other end of the connector, simply push it onto the diverter socket.
If you are installing two water butts, all you will need is an additional link pipe. Ensure that both water butts are level, and drill a hole near the top of both tanks to accept the link pipe.
Tips for keeping a Water Butt in good condition
Now that you have successfully installed the water butt, it's just as important to follow these best practices to keep the water butt in good condition and ensure it lasts for many years.
- Protect the stored rainwater - All water butts will have a lid provided, so it's essential to keep the stored water shielded from the elements.
- Clean the water butt regularly - This will require the water butt to be empty, so it's recommended to do this during the summer. Over time the water butt will be prone to algae and bacteria growth, so use a mild detergent and hot water to clean both the inside and outside.
- Protect from debris - It is good practice to check the diverter for any blockages. It is recommended to check more frequently during Autumn, as fallen leaves could obstruct the flow of rainwater into the water butt.
Whether you’re installing a water butt for a customer or installing one in your own garden, an increased number of water butts will help everyone save money on water, and conserve water - helping us do our part for the environment.
Regularly checking and maintaining the water butt will help to ensure that it stays free from blockages while also keeping it clean and functional.
Check out our extensive range of water butts and diverter kits for your next installation project.
If you require further advice, get in touch with our team of experts or visit your local City Plumbing branch.
Other articles

How to spot a water leak - 10 easy ways
17 Jul 2023 ・ 7 mins

Save Money This Summer by Avoiding These 5 Common Plumbing Problems
06 Jun 2023 ・ 5 mins

Essential Gardening Gear for Summer
22 May 2023 ・ 5 mins

How to get your garden summer ready
22 Mar 2022 ・ 6 mins


