

Favourites

Account

Basket
VAT:
Ex
Inc


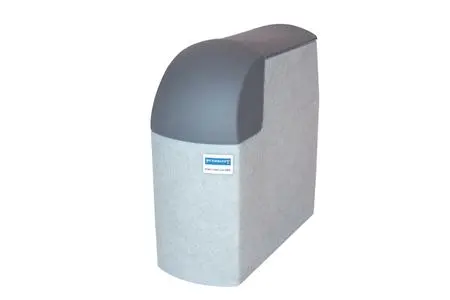
Understanding Water Softeners
If you live in London, the South East, East Anglia, or any of the counties covering 60% of the UK with hard water, you’ll know the impact it has on a home. From limescale buildup in pipes to streaky glass and inefficient appliances, hard water is more than just an annoyance, it's a threat to your plumbing system.
At City Plumbing, we’ve seen a significant rise in water softener sales as technology has become more compact, affordable, and efficient. Whether you’re an installer looking for the best system for a client or a homeowner wanting spotless dishwashing and silkier showers, our guide covers what you need to know about choosing and installing a water softener.
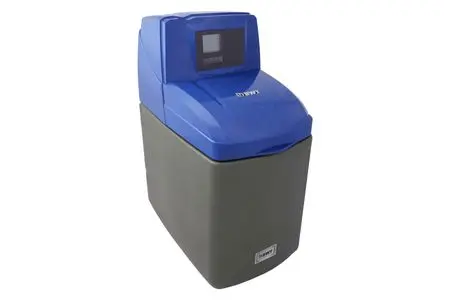
How To Install A Water Softener
Installing a water softener may seem complicated, but it’s actually a manageable task for a handy homeowner. While every model is a little different, the core process is similar: you’re adding a step to your home’s water supply system.
Here's a quick homeowner-focused guide to help you navigate the process with confidence.
Preparation: Know Your Layout
Before grabbing a wrench, pause and inspect the location. Place the unit near the main water shut-off valve (the valve that controls the water supply to the building), a floor drain (a drain in the floor to catch any spilt water), and an electrical outlet (a socket for plugging in electrical devices).
1. The "Big Dry": Isolation
No need to fear floods, as long as the main valve is secure, you’re in control.
- Shut off the water: Close the main water supply valve firmly. Open the lowest tap (faucet) in the house to fully drain any remaining water pressure.
- Use a pipe cutter to cleanly remove a measured section of your main line. Place a bucket underneath to catch any remaining water in the pipes.
2. The Safety Net: The Bypass Valve
Most modern units include a bypass valve.
- Why it matters: It lets you flip a switch and send water directly to your house without going through the softener (great for watering the lawn or when the unit needs maintenance).
- Installation: Connect this valve directly to the back of your softener unit, as per the manual.
3. Making the Connection: In and Out
Reroute water into the In port and out through the Out port.
- The Golden Rule: Don't swap the lines! Hard water goes "In," soft water goes "Out."
- Flexibility is key: Use flexible stainless steel connectors if your local codes allow. They are much more forgiving than rigid copper, making alignment a breeze.
4. The Exit Strategy: Drainage
Your softener will periodically backwash to clean itself.
- Route the drain line directly into a floor drain or utility sink.
- Crucial: Never insert the drain hose directly into the sewer pipe. Leave a 2-inch air gap between the hose end and the drain to prevent sewage from backing up into your softener.
5. Power and Salt
- Connect the brine line from the salt tank to the resin tank.
- When leak-free, plug it in and set your water hardness as instructed in the manual.
Top-Level Tips for a Smooth Install
- For outdoor spigots, keep them on the hard water line. Flowers don’t need softened water, so you save on salt.
- After cutting pipes, use a deburring tool or sandpaper to smooth edges. This ensures a seal and prevents leaks.
- The "First Start" Trick: Turn the water back on slowly by opening the valves a little at a time. Gradually open them all the way to avoid sending a surge of air through your pipes that might rattle your plumbing.
- Run a manual regeneration cycle and check for leaks or drainage issues.
Taking the process one step at a time helps break the job into manageable tasks.
Understanding Water Softener Technology
When choosing a water softener, the first decision is usually between Salt-Based and Salt-Free technology.
1. Salt-Based Water Softeners
These are the most common "true" softeners. They use Ion Exchange to physically remove calcium and magnesium minerals from the water.
- Efficiency: Highly effective at removing total hardness; requires a "regeneration" cycle to clean the resin.
- Installation: Requires a drain connection for brine discharge and usually a power source (unless non-electric).
- Maintenance: Requires regular salt top-ups (tablet or block salt).
- Cost: Mid-range to high upfront, plus ongoing salt costs.
2. Salt-Free Water Softeners (Conditioners)
Technically water "conditioners," these use Template Assisted Crystallisation (TAC) to change the structure of minerals so they don’t stick to pipes as limescale.
- Efficiency: Prevents scale buildup but does not "soften" the water (minerals remain in the water).
- Installation: Simple; no drain or electricity usually required.
- Maintenance: Very low; typically just a cartridge change every few years.
- Cost: Higher upfront for premium units, but lower lifetime running costs.
Mechanical vs. Electronic Configurations
Beyond the salt, you need to consider the physical build and control system of the unit.
Single Tank vs. Dual Tank
- Single Tank: Best For: Smaller homes with predictable water use.
Efficiency: Good, but goes offline during regeneration (usually at 2 AM).
Maintenance: Simple, single resin bed to monitor.
- Dual Tank (Twin Tank): Best For: Large families or homes with 24/7 water demand.
Efficiency: High; one tank provides soft water while the other regenerates, ensuring no downtime.
Sizing: Generally more compact because each cylinder can be smaller than a single-tank equivalent.
Electric vs. Non-Electric
- Electric (Wired): Efficiency: Very high; uses smart meters to regenerate only when necessary based on actual usage.
Installation: Needs to be near a standard 13-amp socket.
Main Point: Features digital displays for salt alerts and usage stats.
- Non-Electric: Efficiency: Uses the kinetic energy of moving water to trigger regeneration.
Installation: Easier in damp environments or locations without easy power access (like under-sink or garages).
Main Point: No "brain" to fail; extremely reliable and immune to power cuts.
Frequently Asked Questions About Water Softeners
What does a water softener do?
A water softener removes or neutralizes minerals—specifically calcium and magnesium—that cause "hard water." By doing this, it prevents limescale buildup in pipes and appliances, helps soap lather more effectively, and prevents white spots on glassware and bathroom tiles.
How does a water softener work?
Most systems work through a process called ion exchange. Hard water passes through a tank filled with resin beads coated in sodium. As the water flows through, the calcium and magnesium ions "stick" to the beads, and the sodium ions are released into the water, resulting in soft water at the outlet.
Can you drink water from a water softener?
Yes, softened water is generally safe to drink. However, because the process adds a small amount of sodium, it may not be suitable for infants or individuals on a medically supervised low-sodium diet. We recommend maintaining one "unsoftened" tap in the kitchen for drinking and cooking.
Where is a water softener stored or installed?
The most common location is under the kitchen sink, as this is usually where the main water stopcock is located. Other common spots include utility rooms, garages, or even outside in a dedicated weatherproof and frost-protected cabinet.
Are salt water softeners effective?
Salt-based softeners are considered the "gold standard" of water treatment. Unlike conditioners, they physically remove the minerals from the water, meaning you will feel the difference in your hair and skin and see a total elimination of limescale in your kettle and appliances.
Are water softeners worth it?
For anyone living in a hard water area (which covers much of the UK), a water softener is a wise investment. They can extend the lifespan of your boiler and appliances by up to 25%, reduce detergent use by 50%, and lower energy bills by keeping heating elements free from scale.
What water softener tank size do I need?
Water softeners are available with a range of different tank sizes in order to provide your household with enough soft water.
A rough tank size requirement can be calculated by multiplying the number of people in your household by 75 (the average amount of gallons used per person, per day) – then multiply this number by the GPG (grains per gallon) of hardness minerals in your water supply.
For example, a four-person household uses around 300 gallons per day (4 x 75). If the water has 10 GPG, 3,000 GPG of minerals will need filtering each day.
Updated 20th April 2026
Help & Feedback
 Chat With Us
 Give Us Feedback